| Deadly Risks of Riding | Arrive Alive Mindsets |
| Dressing For The Ride | Dress For The Slide |
| Poor Machine Connection | Maintain Razor Sharp Muscle Memory |
| Restricting Evasive Potential | Be Prepared For The Unexpected |
| Line Of Sight Negligence | Respect Line Of Sight |
| Charging Intersections Or Turns | Exercise Caution With Intersections And Turns |
| Inattention To The Surroundings | Pay Attention To React Instinctively |
| Riding With An Unfit Mental State | Ride With Mental Clarity |
| Operating Without A Ride Plan | If You Fail To Plan, You Plan To Fail |
| Exceeding Your Skill Bubble | Know Your Limit And Stay Within It |
Turns
- 1. Proper Ride Plan for Turns:
- Preparation: Brake before the turn, not in it. Set your gear, speed, and line in advance.
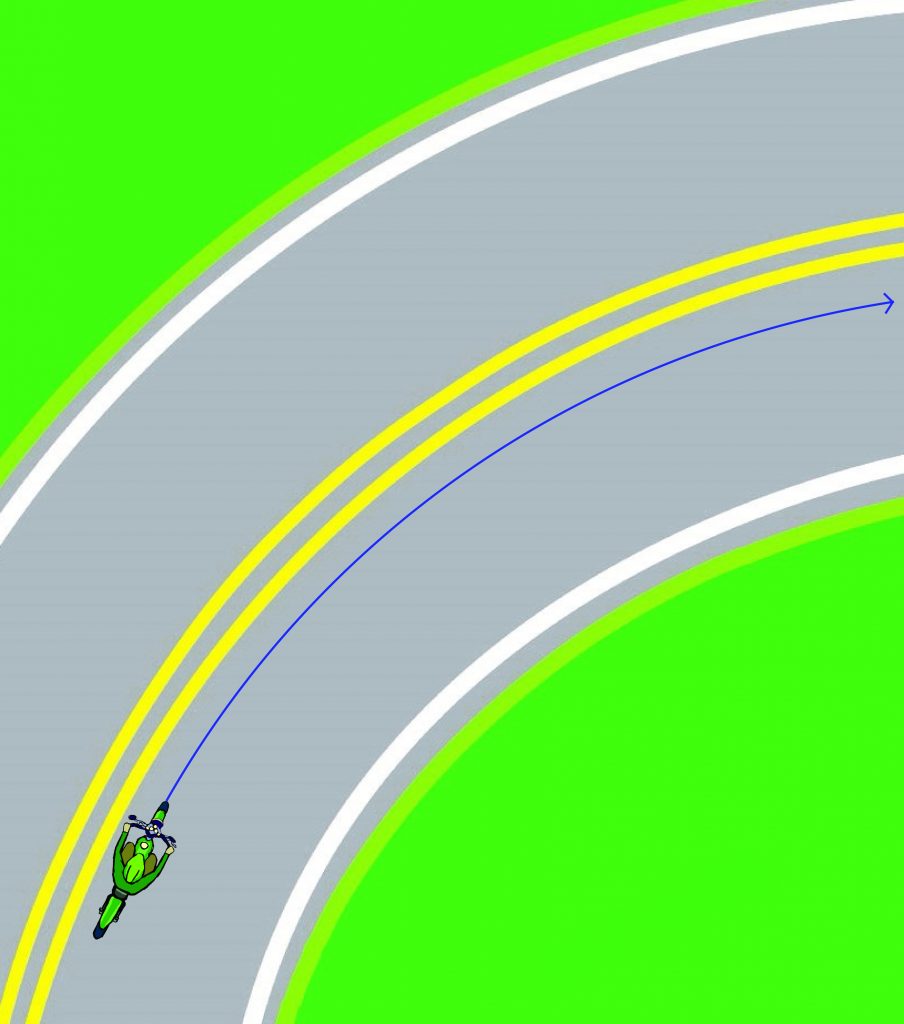
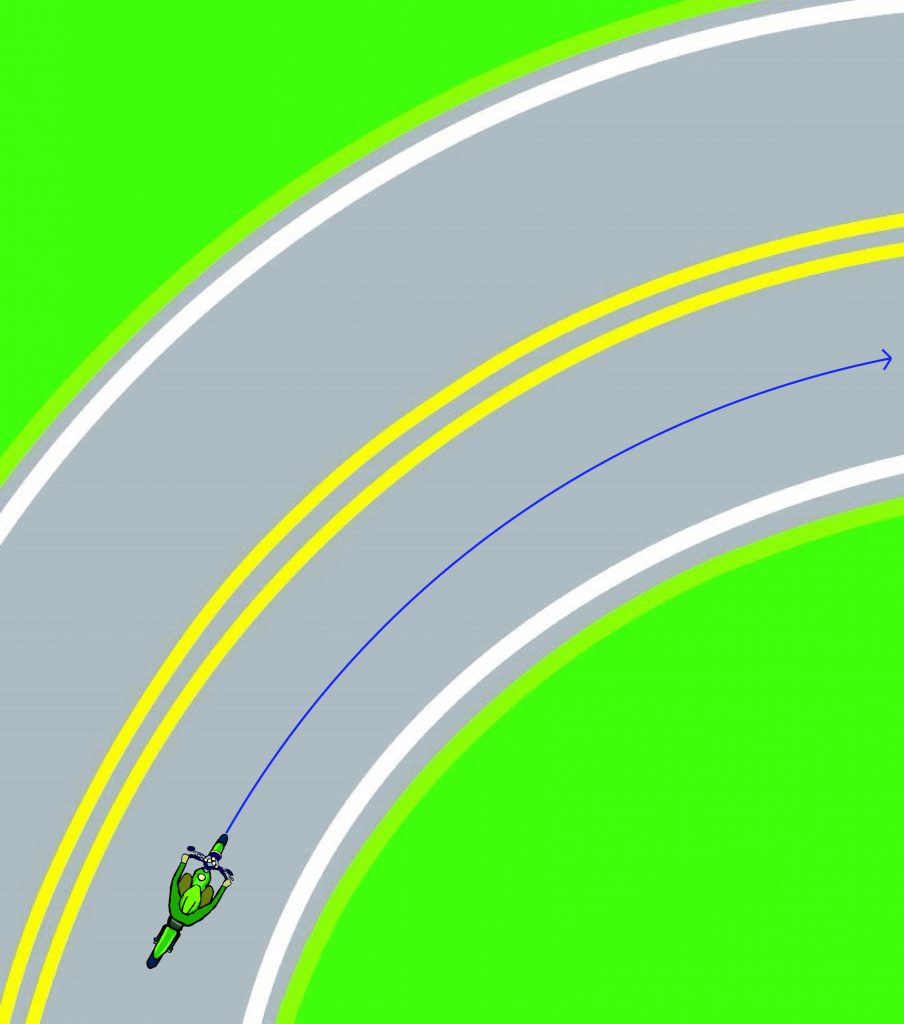
- Eyes: Look 2-3 seconds ahead into the curve, not too close to the bike.
- Throttle & Steering: Use steady throttle and steering, avoid sudden braking in the turn.
- Preparation: Brake before the turn, not in it. Set your gear, speed, and line in advance.
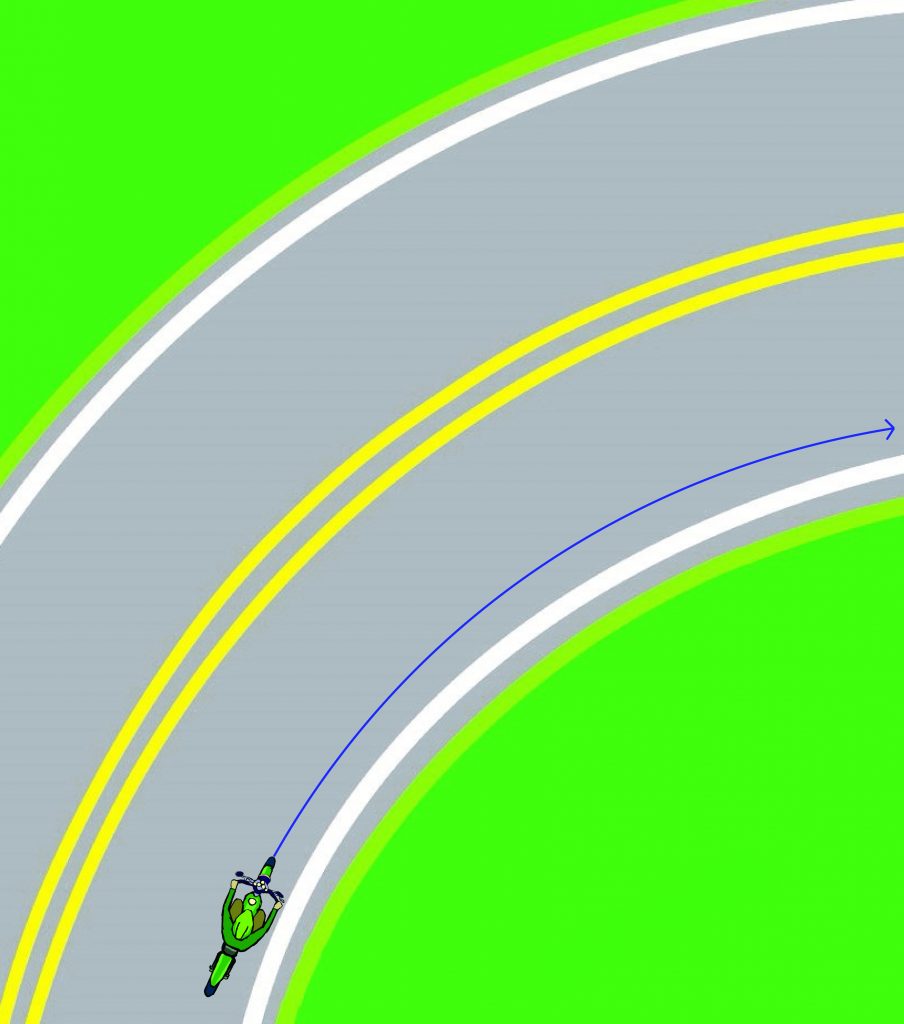
- 2. Common Causes of Running Wide:
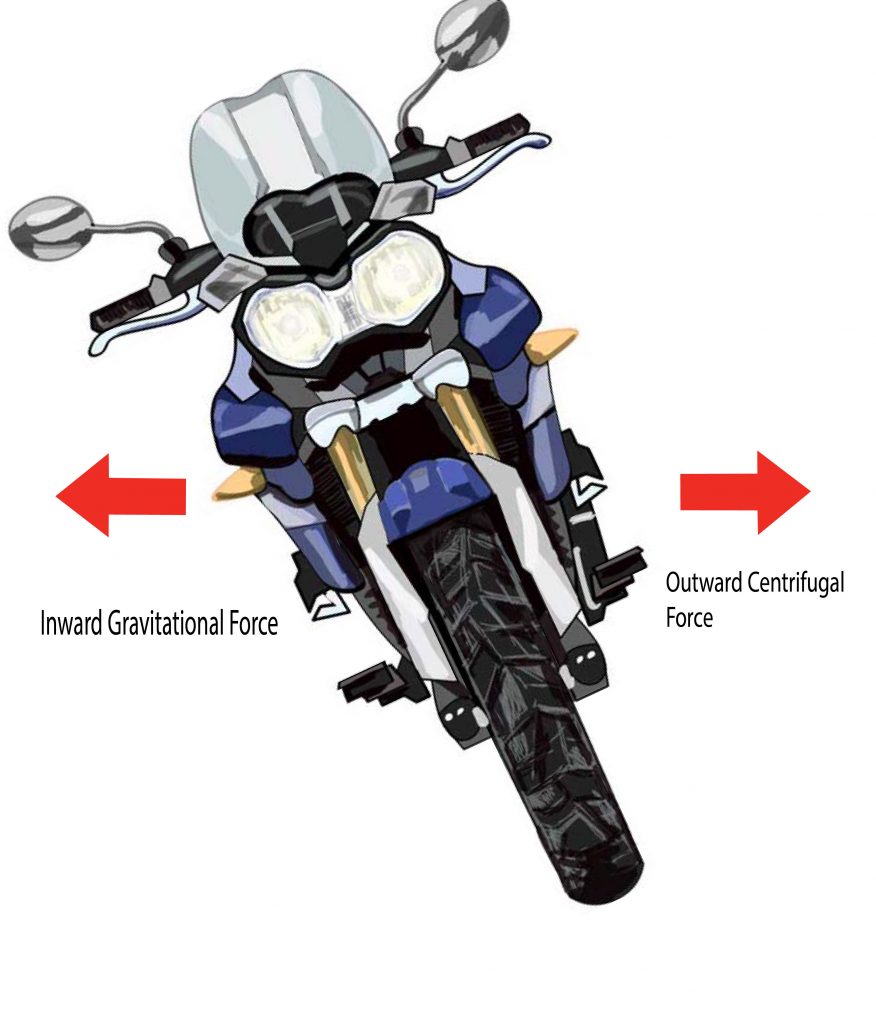
- Excessive Speed: Approaching too fast makes it hard to balance the forces (gravitational vs centrifugal), leading to drifting wide.
- Excessive Speed: Approaching too fast makes it hard to balance the forces (gravitational vs centrifugal), leading to drifting wide.
Panic Braking: Can cause loss of traction or make the bike stand up, drifting off course.
- 3. Target Fixation:
- What is it? When your eyes lock on something (like a hazard) and you end up riding toward it.
- Fix it: Always focus on where you need to go, not where you don’t.
- What is it? When your eyes lock on something (like a hazard) and you end up riding toward it.
- 4. Cornering Tips:
- Start Slow, Build Confidence: Begin with low speeds, maintain steady lean, throttle, and position. Gradually increase speed and lean as you get comfortable.
- Comfort Zone: Each rider has their own “comfort zone” for speed and lean. Learn yours through consistent practice.
- Start Slow, Build Confidence: Begin with low speeds, maintain steady lean, throttle, and position. Gradually increase speed and lean as you get comfortable.


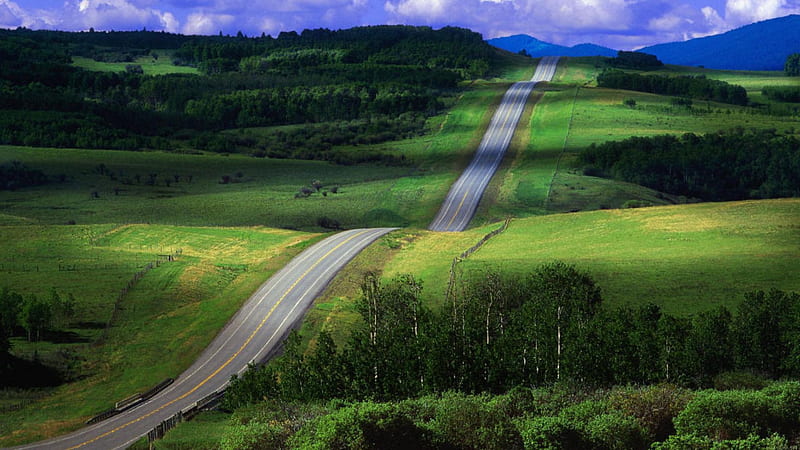
Hills
- 1. Riding on Hills:
- Crest: As you approach a hill crest, ride in the center of your lane for balance and more options in case of a hazard.
- Downhill: Be mindful of longer braking distances and the risk of flipping over handlebars when braking too aggressively.
- Crest: As you approach a hill crest, ride in the center of your lane for balance and more options in case of a hazard.
After Cresting: Once you crest, you have a great vantage point for up to 10 seconds. Enjoy the view but stay focused on the ride.
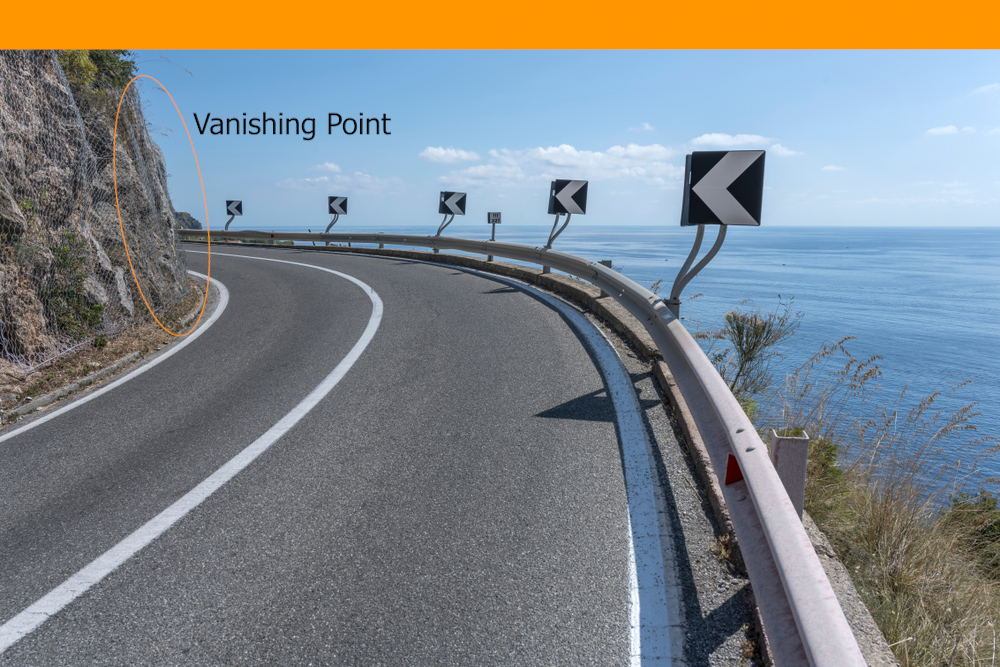
- 2. Vanishing Point (Turns & Hills):
- What is it? The point where you can no longer see the road clearly due to bends or hills.
- Adjustments: As the vanishing point gets closer, reduce speed to match the upcoming curve’s severity. Lack of Line of Sight means you need to adjust your speed or lane position to maintain Lead Time.
- What is it? The point where you can no longer see the road clearly due to bends or hills.

- 3. Lane Positioning:
- Inside Lane: Best for maneuvering if a hazard comes up, but keep in mind it may limit your visibility.
- Inside Lane: Best for maneuvering if a hazard comes up, but keep in mind it may limit your visibility.
Outside Lane: Gives better visibility but increases the risk of running wide in turns. Be careful.
Camber
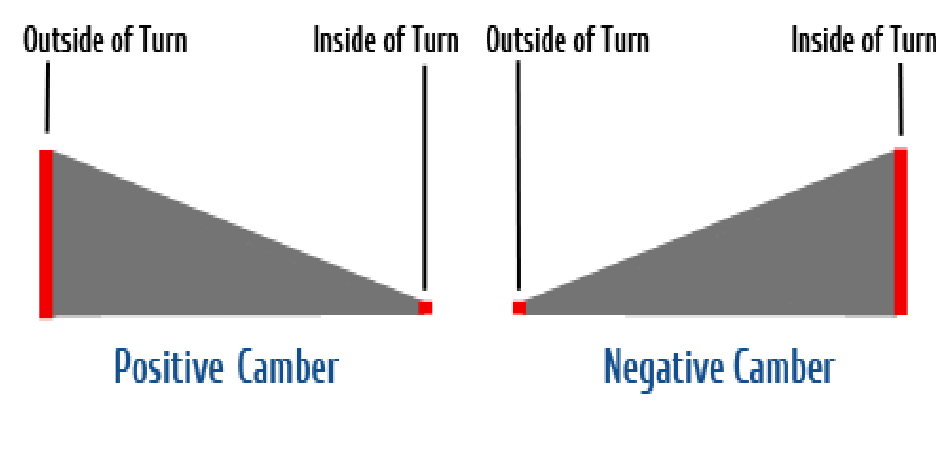
- 1. Positive Camber:
Roads typically slope inward, which helps gravity assist in turning. You’ll need less lean to navigate.
- 2. Negative Camber:
- Roads slope away from the turn, making it harder to turn. These turns need more lean, and they can catch you off guard, so reduce speed.
- Roads slope away from the turn, making it harder to turn. These turns need more lean, and they can catch you off guard, so reduce speed.
- 3. Signs:
Watch for “adverse-camber” signs, especially in turns, as they indicate negative camber.
Overall Tips:
- In Turns: Maintain a smooth, controlled approach; brake and adjust speed early.
- For Hills: Use the best lane position for visibility and take into account braking distance on downhill slopes.
- Camber: Be extra cautious with negative camber turns, adjust speed, and lean carefully.
This is all about building muscle memory, learning your limits, and staying consistent to keep control.